(Photo: a portion of Upper Washbowl Cliff, with a climber visible back in the corner, in the middle of the second pitch of Partition (5.9-).)
I know that I have no special talent for rock climbing.
I enjoy it and do it as much as I can. But since other things in my life (like marriage, children, and work) also take up lots of time, I don't really get out to climb that often. It's been an awesome year, and I've been lucky enough to take a few multi-day trips to Vegas and the 'Dacks, but even including these trips I don't think I'll get more than two dozen days on real rock in . I know that I am extremely fortunate to get this many days to play outside; two dozen probably sounds like an awful lot to some climbing dads out there. But when you're talking about making athletic progress, let's be honest: it's a joke.
It just isn't that easy to get better when you don't get out that much.
But I also have a firm belief that an ordinary guy like me, an occasional weekend warrior, can be a 5.10 climber. I don't think superhuman fitness or even perfect technique is required. A certain basic proficiency plus just enough experience should, in my opinion, get me there eventually. This year my goal was to take a big step in the right direction by getting solid at 5.9. Over the summer I started to feel like it might be happening. I seemed to be doing well on 5.9 climbs in the Gunks. And aren't Gunks ratings steeper than everywhere else? I started to entertain the notion that maybe I could walk up to a 5.9 anywhere and feel confident that it would be no problem.
But then I did some climbing in the Adirondacks. And I guess I got my ass kicked a little bit. The vertical crack climbing felt unfamiliar. I realized how narrow my Gunks-focused skill set really is. And I discovered that maybe the ratings in the 'Dacks are even stiffer than in the Gunks.
On day one of my recent two-day trip to the Adirondacks with Adrian, I was extremely grateful not to be leading the Poke-O Moonshine 5.9+ Bloody Mary. And I struggled to lead the 5.8+ P.T. Pillar, taking a hang and then a short fall.
On day two, Adrian and I decided to visit Upper Washbowl Cliff. I really wanted to hit the two John Turner classics on the cliff, Hesitation (5.8) and Partition (5.9-). I was also interested in the 5.8 link-up of Prelude and Overture, and the 5.6 Weissner Route. So there were plenty of possibilities available to us.
As we trooped up the hill to the cliff, we passed the single-pitch Creature Wall and found it quite wet. Nevertheless there was a party at the base and a guide setting up numerous topropes for a group.
This was a bad sign. I didn't expect crowds. Where were we, the Trapps?
But we were relieved to find no one at Upper Washbowl. The cliff seemed empty and the trail deposited us right at the base of Hesitation, John Turner's four-pitch route up the center of the cliff.

(Photo: working up pitch one of Hesitation (5.8).)
The crux pitch of Hesitation is the first. It ascends a corner with a crack at the back. Its appearance should have reminded me of my struggles on P.T. Pillar. I was also feeling a bit less than 100 percent after imbibing several of Lake Placid's fine Ubu Ales the previous evening. But for some reason no warning bells went off in my mind and I volunteered for the lead. I didn't intend to wuss out just because the previous day had been hard. I felt I needed to go right back at it. And this pitch used to be considered a 5.7! The new guidebook had upgraded it to 5.8, but note that there is no plus after the 8 on that grade. I figured I'd be fine.
In the end, I did get through it okay. I took no falls or hangs. But I found it hard and committing. The crack was too wide for jamming, I thought, so I mostly laid back off of it, feeling insecure. I had to work up the courage to trust my feet over and over again. All the moves worked out fine, but I took forever, worrying my way to the end.
When Adrian joined me at the top of pitch one he said he thought the pitch was pretty straightforward.
I asked him if he been able to jam the crack, as I'd found it too wide.
"Sideways," he said. "You have to turn your fist sideways."
Jesus, I thought, I really don't know how to crack climb.
No wonder I thought the pitch was hard. I had no idea how properly to climb it! I am such a maroon.
Even taking my incompetence into account, I find it kind of amazing that this pitch was long considered a 5.7. It seemed harder than that to me. It was much harder than pitch four of Gamesmanship on Poke-O. I still don't get it.

(Photo: a sun-bleached shot of Adrian at the end of the pitch two traverse on Hesitation.)
Pitch two, rated 5.7, was Adrian's lead. This pitch is where Turner felt the need to hesitate on the first ascent, and it's easy to see why. An exposed traverse with so-so feet takes you out to the end of an overhang. The climbing above is easy but there's no way to tell from below.
The traverse really isn't bad. The feet are thin at first but they get better as you move across and the pro is also solid until you reach the end of the roof. Still, it is exciting, and once you clear the overhang the easier climbing up and left to the belay point has precious little pro. I have to give Adrian credit, he managed to place two micro-nuts that I thought were good in the runout part of the pitch.

(Photo: The start of the 5.6 pitch four of Hesitation.)
The last two pitches are nice, but in my opinion less memorable than the first two. A long 5.5 pitch three leads to the final corner that is ascended by pitch four. After an awkward move or two to get established on the wall (see photo above), good positive edges on the right face take you to the top. It seemed to me to be fairly graded at 5.6, a fun end to an outstanding multipitch climb.

(Photo: Starting up the Weissner Route (5.6). First ascent 1935!)
By the time we found the right-side rap recommended by Lawyer & Haas and had a little lunch, it seemed like the day was already slipping away. I wanted to make sure we got to do the second pitch of Partition (5.9-), which the guidebook lists as the best pitch on the cliff. And truthfully I wasn't feeling like challenging myself all that much on lead any more. So I proposed to Adrian that we do the first two pitches of the Weissner Route (5.6), which would place us in a good position from which to climb the final pitch on Partition.
Adrian led pitch one, which is now graded 5.6 but historically was considered a 5.5. The crux comes at an obvious, square block that forms an overhang with a fixed piton underneath. Adrian puzzled over the move for a minute before powering up the crack on the left side. When it was my turn, I thought I actually found a more elegant solution, using the right edge of the block as well as the crack on the left. But I had to marvel at Fritz getting up this in mountain boots in 1935. And 5.5?? I've never been on a 5.5 with moves like this.

(Photo: Adrian almost to the top of Partition (5.9-), in the final off-width section.)
As I emerged from the easy, quite enjoyable 5.4 second pitch of the Weissner Route, I had no trouble finding Partition. It is a another Turner route so, no surprise, it follows a vertical crack in a corner. This corner is very imposing and it widens at the end to an off-width. The kicker on the day of our ascent was that it was also wet right before point where the crack widens. Once again we were looking at a route that had been upgraded by Lawyer and Haas in their recent guidebook, to 5.9- from 5.8+. It sure looked hard to me, steep and sustained, and there was no telling what that off-width at the end would be like.
I wondered if we could even climb it with the wetness but there was a party just rapping off and they said it wasn't too bad. Adrian was psyched to get on it so I graciously allowed him to lead it.
He didn't exactly make it look easy, but he got up it without any real trouble. All the way up he was very pleased with the hand jams.
When the rope came tight on me, I knew it was now or never. I was going to jam my way up this crack or I wasn't going to get up it. And for the most part it was a success. Hand jam after hand jam, the crack was very secure. It seemed to go on forever. I hadn't taped up, and the back of my right hand got ripped up a bit, but not too badly. As I finally neared the off-width I thought I might be on my way to a send, but then the crack became very wet. I tried to jam it and my hand slipped right out, causing me to take a fall oh so close to the finish.
Trying again, I slipped out once more.
As I paused to rest I looked around and realized I was failing because I was missing a diagonal, ramp-like series of dry holds on the right face of the corner. I had gotten tunnel vision, and had become for the first time in my life TOO focused on the vertical crack, ignoring the other holds.
Once I woke up and saw the holds to the right, I got easily up into the off-width, which ended up requiring no off-width technique. There are good holds at the top of the slot and the final move out of it plays out like a Gunks climb, with a couple horizontal jugs providing the means of escape.
Partition was the pitch of the weekend, we both agreed. So awesome. I want to go back and lead it clean. And even though I fell in the wetness while seconding it, I view my time on Partition as a success. Maybe I'll look back on it as the pitch that finally made me into some kind of crack climber.


 Above and below: The dust storm in Valley of the Gods, Utah. Valley of the Gods is similar to Monument Valley, although on a less "grand" scale. It is a gem of an area, however, and if you are passing through on your way to Blanding from Monument Valley, its worth checking out.


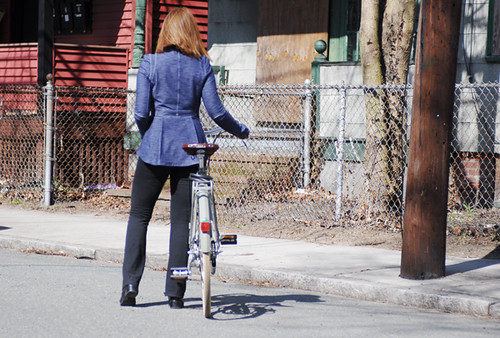
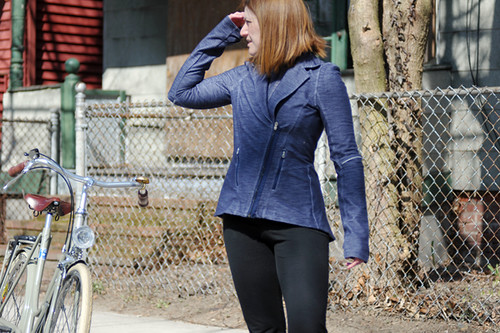
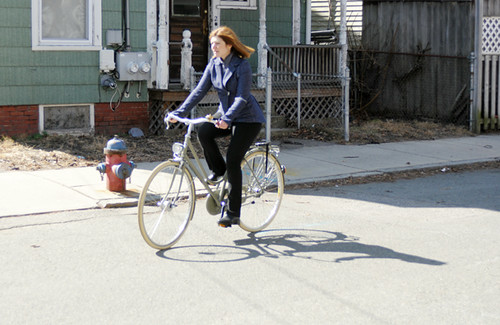
 My last ride of was with the delightful Bekka ofBikeyface, who is slowly but surely getting drawn into roadcycling (eeexcellent). We've been practicing our "epic" faces, as you can see.
 We had some things to talk about, so we decided to "go for coffee" - a 20 mile ride to the Ride Studio Cafe and back.
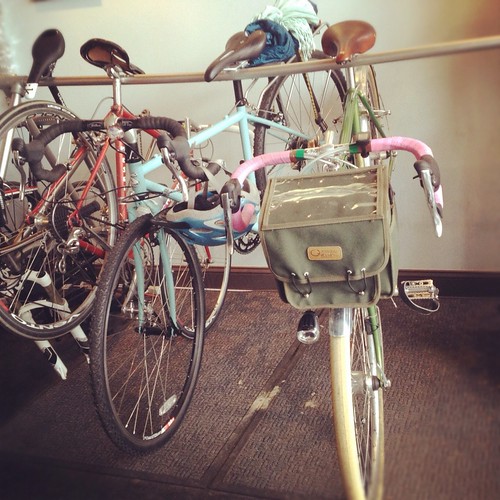 Once there, we nearly took the rack down with 60lb of collective bike poundage, but never mind!
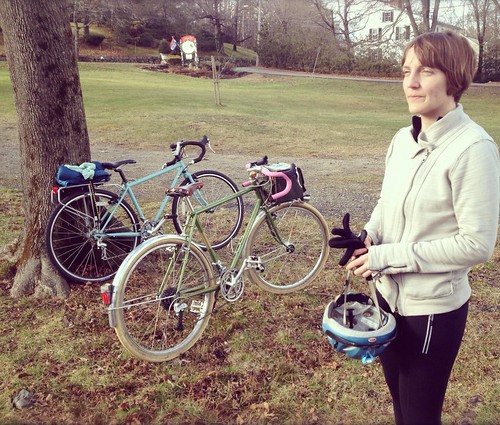
 The weird thing about riding with Bekka, is that her bicycle - a Surly Cross-Check - is the same make and model as the Co-Habitant's bike - only about half the size and built up very differently. The smaller sized Cross-Check frames have sloping top tubes and different seat tube angles(75° on the 42cm frame vs 72° on the 62mm frame), so altogether her bicycle registers as sort of the same bike as his, but not really. Freaky. And it also goes to show that when reading bicycle reviews and test ride reports, it's worth paying attention to the size of the bike described - this factor can make a difference. But despite the blatant differences in frames, both Bekka and the Co-Habitant are quite happy with theirs, so it seems fair to conclude that the Cross-Check is a crowdpleaser.
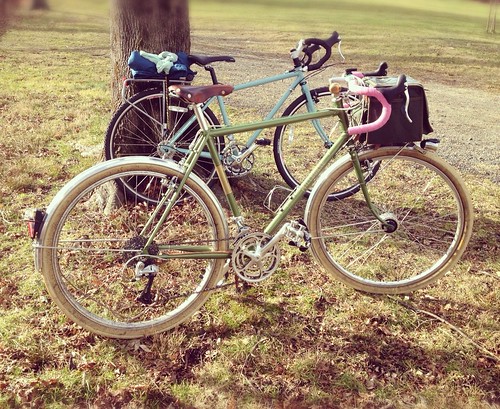 With Bekka on the Surlyand me on the Rivendell, we were pretty well matched for speed, which was nice. It was a quiet morning just before New Year and we were able to ride side by side some of the time.I used to be vehemently against cycling side by side on the road - especially in the city - because I felt that this distracted me from paying attention to traffic. Now I am less vehement about it, simply because I've ridden with people who cycle side by side as a matter of course and have learned to adapt. Still, I seldom have a good feeling about it. While in Massachusetts it is legal to ride two abreast, one could argue that doing so is not always practicable, and therefore not in good faith. It has also been known to provoke driver aggression. The local cyclists I've been riding with are split on this one, with some groups prohibiting riding two abreast and others insisting on it, so I am getting some rather mixed messages. I'd like to decide on a policy and stick with it without being influenced by the people I am riding with, but haven't made up my mind yet.
 Switching from "lone wolf" cycling to riding with others has caused a rather dramatic upheaval in my little world.I had tried the social cycling thing before and did not enjoy it, but somehow this time around it clicked. Suddenly I have a full "dance card" of cycling events every week, and in the winter at that. Not that I am complaining! But this is definitely a new era, and I am curious what the future will bring.

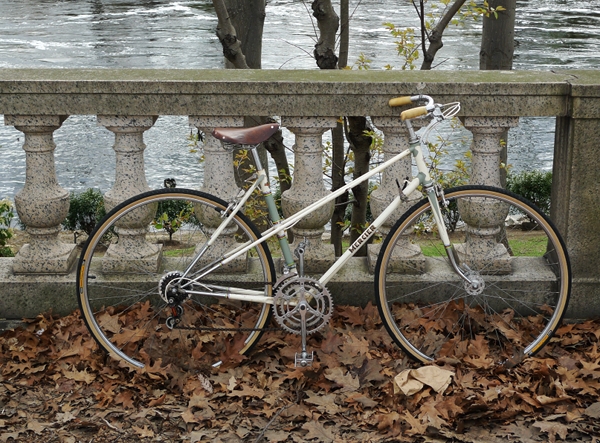 Can you spot the differences between this picture and the Mercier in its initial state?
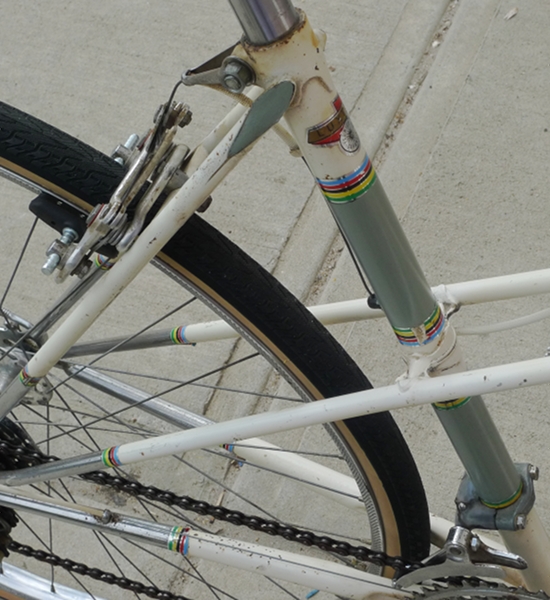 If you are thinking that the colour scheme looks a bit different, you are right. Originally, the
 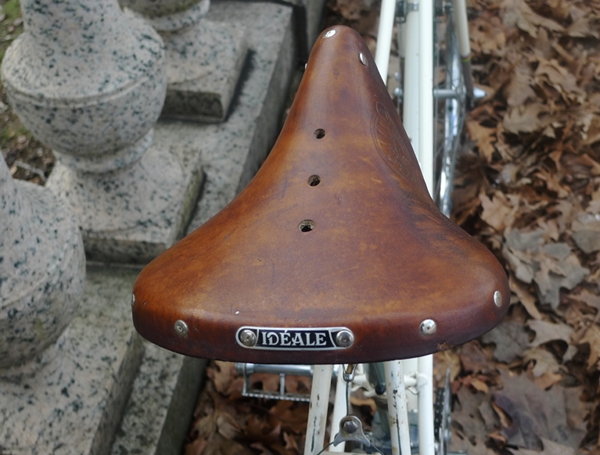 Another visible update to the Mercier is this fantastic
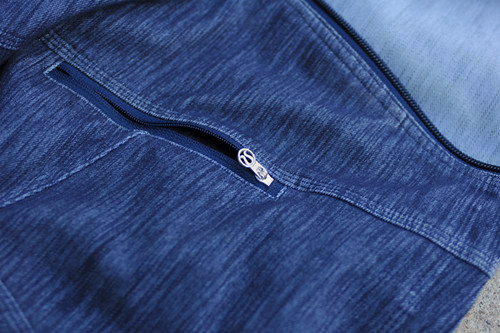
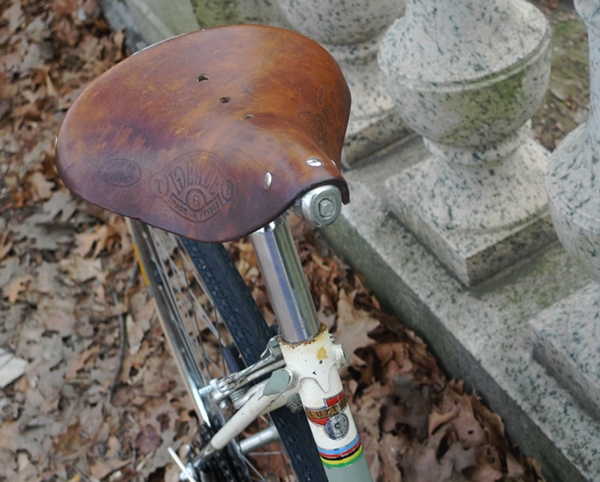
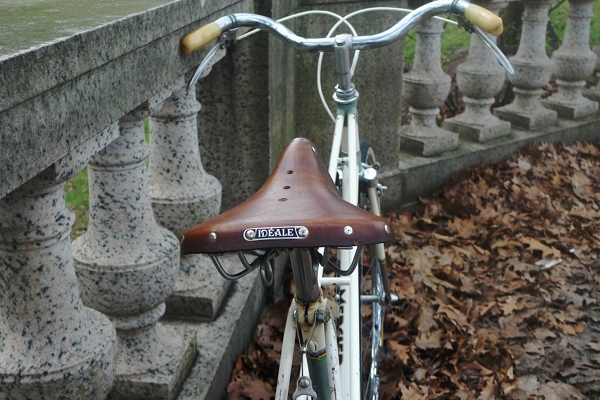 It is comparable to a Brook's B72S and has two rear loop springs.
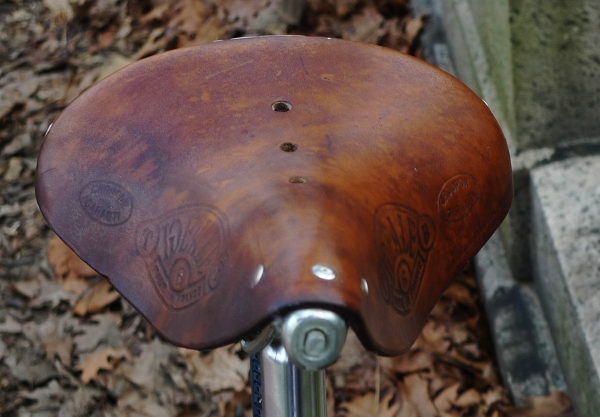 An extremely comfortable, elegant saddle. And the engraving is gorgeous. I have cycled a total of maybe 50 miles on it so far and it feels just perfect.
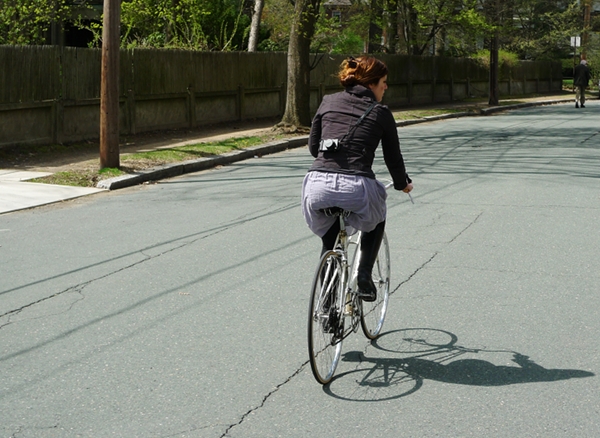 The last significant update has been replacing the tires. The shop where I found the bike fitted it with 20mm racing tires. To give you a point of reference, 20mm is narrower than the wheel rims. I think the fact that I was even able to ride on these tires at all - let alone 10 miles to
  Thankfully, now the bicycle is fitted with 32mm
 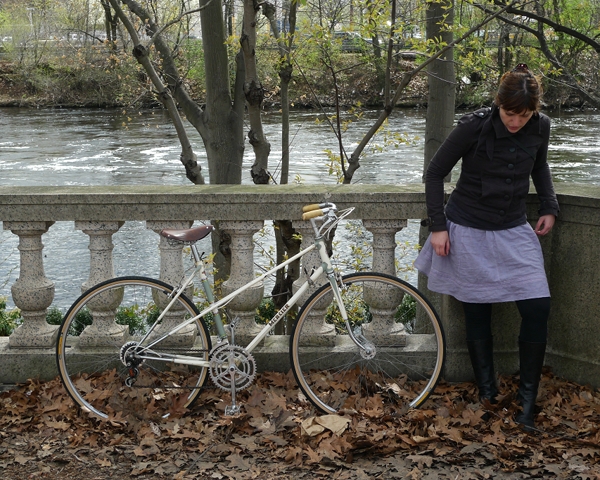 In addition to these updates, there are other little things we've done, like remove the spoke protector and the reflectors from the wheels, remove the