The
OYB Pannier is a small Swiss army surplus bag, modified via the addition of rack attachments and other features byJeff Potter - the owner and author of the project Out Your Backdoor ("indie outdoor lore and more"). I purchased this bag asa smaller alternative to the enormous shopper pannier I normally use. My criteria were durability, classic aesthetics, a trustworthy attachment system, a reasonable price, and a size just large enough to snugly fit my medium format camera equipment or my (very small) laptop.While I am aware that these same bags (without the bike-ready modifications) can be purchased from several other sources, I opted for the
OYB version because I wanted the modifications to be made by someone with experience and because I wanted to support the "Out Your Backdoor" project, which provides some great resources for its readers.

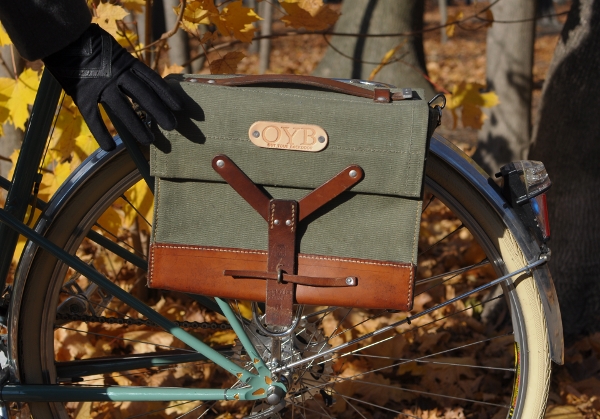
Compact and boxy, the pannier is a Swiss military bag made of a thick, stiff, olive-green waxed canvas with brown leather trim and steel rivets. The
OYB leather patch is a lighter shade than the rest of the leather on the bag, but this can easily be changed with a modest application of neatsfoot oil or even
Proofide.I am not sure whether this particular bag started out as new-old-stock, or whether it had been used in its previous life, but to me it looks more like the former. The condition is better than I had expected based on the pictures and product description on
OYB.
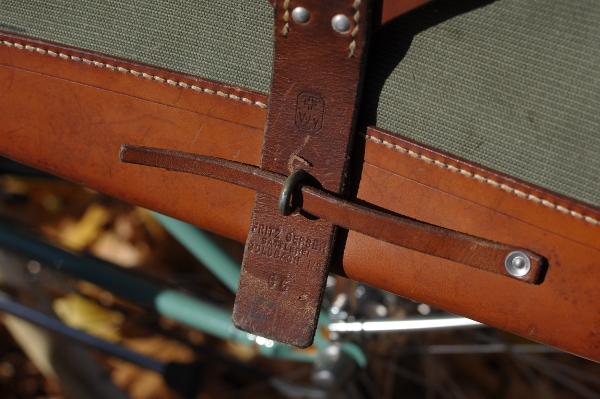
The closure system is simple and secure: That very stiff leather cord pulls out of the metal loop, and the thick leather strap lifts up off the loop to open the bag. For those curious, the imprint on the leather reads "Fritz Gerber Sattlerei, Goldbach."

The attachment system is a combination of metal hooks and bungee cords, with which the pannier is secured to the rear rack.The rack I have on this bicycle is the
Constructeurrack from
Velo Orange, which is quite small.

Here is a close-up of the metal hooks. They are riveted on to the bag.
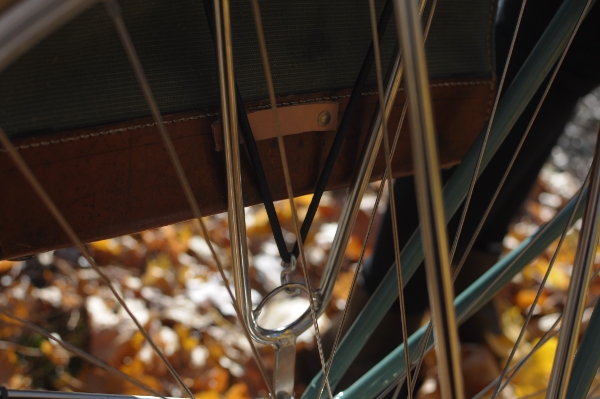
And here is a close-up of the bungee attachment. Together, these two attachment points ensure that the pannier does not sway or bounce against the rack - a good feature when you are planning to carry camera equipment. When the bag is not being used as a pannier, the bungee hook attaches to that small leather strip you see on the back of the bag - so that it does not hang loose. [
Edited to add: I am now told that the bungee cord is supposed to go through that leather loop before you hook it to the bottom of the rack - oops.]
In addition to the rack attachments, the
OYB pannier can be ordered with a number of other optional features, including shoulder strap attachments with a removable shoulder strap. I asked for the strap, because I pan to carry the bag around when off the bike, and this set-up essentially this gives me a camera bag and pannier in one. Other options include lights mounts, and a variety of other attachments.
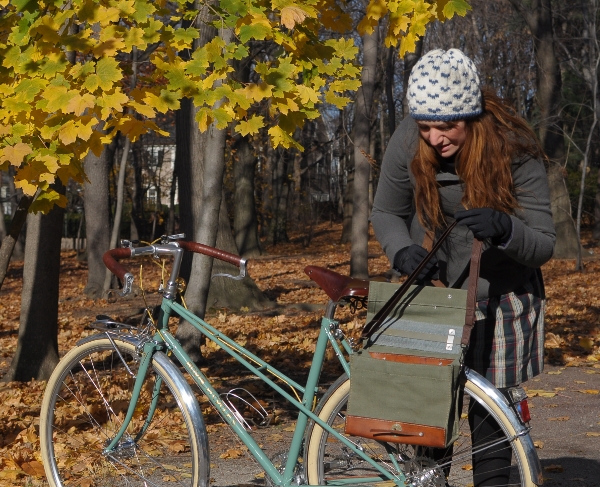
To give you a sense of scale, here is the pannier in relation to me and to the entire bike. It is a
small bag. Dimensions are listed as:8.5" tall, 4" deep, 11.25" wide (5.4 liters). Inside, the length of the bag is listed at 10.75", but I was hoping against hope that it would fit my laptop.
OYB gives instructions for stretching the bag out with magazines in order to make it fititems of that size, and I will give this a try.If I can get my laptop to fit, I will be thrilled - but I am not getting my hopes upand am prepared to content myself with this being a camera bag only.

If it were not for the laptop fit issue, this would pretty much be my dream pannier. The mil-spec colour scheme is not for everyone, but I love it, and it suits almost all of my bikes nicely. The durability of military surplus items is superb, and I appreciated getting the bag customised by Jeff at
OYB. This is a classic, versatile, and reliable little pannier refashioned by someone who loves bicycles.
edited to add: I have sold the pannier since the review, only because it was too small for me. I loved everything else about it.


 It is here, at Narada Falls, that the sparkling clear waters of Paradise River plunge over the edge of a cliff and drop dramatically 168 feet. The Paradise River runs clear, not milky, because it originates from snowfields, not debris-laden glaciers.
 For some early visitors, the power of the waterfall suggested spiritual connections. They named it Narada after a powerful sage of Hindu mythology who acted as a messenger between human and divine realms. [National Park Service Sign]
 It wasn't the biggest, or tallest, or widest waterfall I've ever seen. But it was one of the most beautiful and graceful.
 There is a hint of a rainbow across the center of the falls.
 The “drapery” of water opens and closes as it falls. It was enchanting.
 Constantly changing as you watch, it is dependent upon the flow of water from above as well as the cliff face itself and the plants thriving there.
 Pulling into the parking lot there were low clouds and not much sign of the sun. We walked the thirty seconds to the lower town wall to see much of it wet, including potential starts to routes we were intending to do. I walked around for other objectives while Adam took a party separation. Godzilla was dripping and Princely Ambitions was plenty wet. I met Adam back at the base of Aries crack where I told him we might as well climb since we were already there. We geared up at the base of Aries crack hoping to continue onto Taurus after we gained the first ledge. Or at least we would see if things looked dry enough to continue.
 Heading into the Aries crux
 Adam on GNS


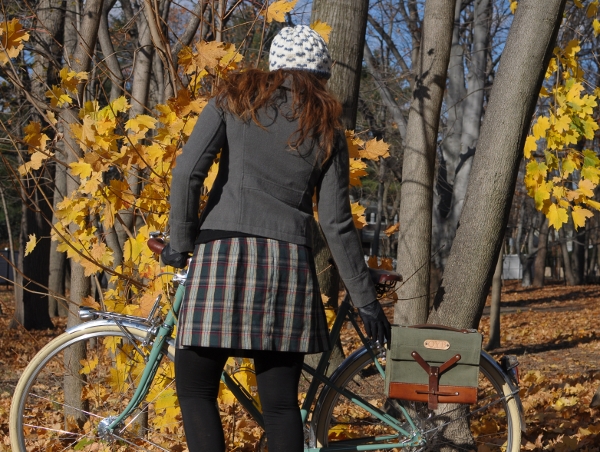
 At first glance, this might look like a "sad panda", but it's really not. It's just that today was 35° F and windy out. Riding to my destination I must have been a site, because tears were streaming down my face, then freezing in disgusting patches all over my cheeks. Mmmm!
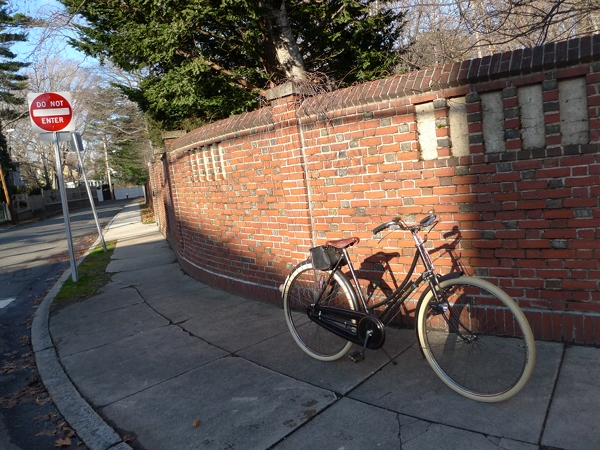 One thing I truly love about the winter is the beautiful light. Velouria thinks it flatters her colouring and gives her a sense of mystery. She also thinks that she will look quite nice once the snow arrives. What a vain bicycle!
 Dramatic self-and-bike shadow. That lumpy stuff on my face is the tears - next time the sunglasses are coming for sure.