April update.....late this month before we'll see the Phantom Guide...late August before we'll see the 6000.
http://coldthistle.blogspot.com//04/scarpa-phantom-guide-vs-la-sportiva.html
Last issue of R&I has a good write up by DR on the new Scarpa single boot, Phantom Guide. They look and feel even better in person. The newest Phantom 6000 dbl isn't on the web page last I checked. So thought some might want to see it as well.
The two boots in the new Phantom series so far are REALLY low profile and lwt boots. Hopefully I'll be using a pair of the dbls shortly and can give more feedback and a detailed review and comparison to my Sportiva Baruntse (incredible boot btw) and the Spantik.
My take from playing with them @ the OR show is they will be as big a jump in mtn boots technology as the Sportiva Batura and Spantik were a couple of years ago. Crampon fit might be a bit of an issue though with the extremely low profile toe and soles. But the same will make them climb really well I suspect. We'll have to wait and see. The boots should be out to retailers in a month or so. Check Amazon and Backcountry on delivery dates if you are interested. Plenty of time I am hoping for the spring Alaska season. Amazing just how good the gear is getting!
The last generation Scarpa Phantom Lt had already won the enviable reputation of being a more durable boot than the Batura on the long Chamonix mixed routes. I am hoping they continue to live up to their reputation with the newest boots.
Feb 5 update:
Going to be March before we see any of the new boots in the US. In a size 42 the Guide weights 1# 15oz, the 6000 is 2# 3oz. Sizing is better in these boots compared to the older model Scarpas. Instead of a full size smaller they are running a Euro 1/2 smaller than American sizing.
The Guide will be imported in a full 1/2 size run. SADLY.....Scarpa USA has again decided to bring the Phantom 6000 in only in full sizes. Bummer that one as I really need a 45.5 to get the best advantage from the boot. Better I guess than Sportiva who only makes full size shells on their dbl boots. At least I could buy a true 45.5 if I am in Europe or possibly Canada.
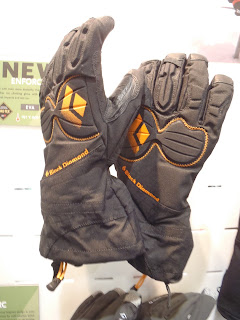
Phantom Guide, single boot with attached super gaiter.


New Phantom 6000, looks to be one of the lowest profile and lowest volume dbl boots on the market. I suspect it will be a big hit for some of us.. For my own use I have thought what was really needed was a bit less volume than the newest huge dbls and all the current technology to come up with a boot that was warm enough for most winter stuff and would still climb very well.
I suspect the 6000 has answered some of that request.
The new Scarpa 6000 dbl boot


 We had descended into the canyon, and now were going up to where the drawings are located.
 The overhang sheltered the drawings for many years. But time and changing environmental conditions have taken their toll.
 The tour guide discussing the drawings with one of the group.
 This image has been enhanced a little to bring out the faded drawings. It is amazing to consider that these were made several thousand years ago, and that we will likely never know what they meant.
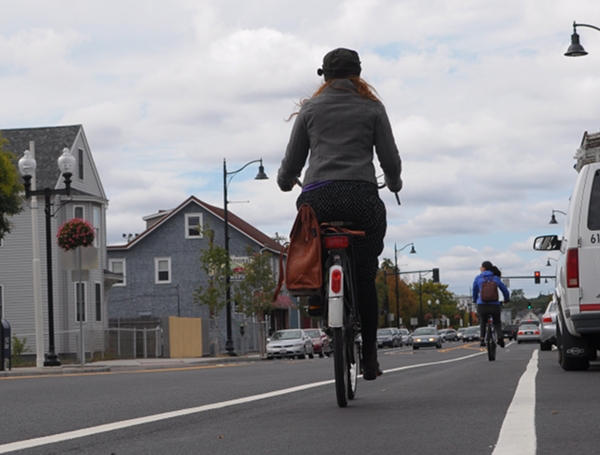 When I ride through parts of town with chaotic car and pedestrian traffic, I find that I need to limit my speed in order for my reaction time to be adequate. I told this to another cyclist one time and he laughed: "But the speed limit is 20mph here! You can do 20 and still be fine." But I don't believe that's accurate. Maybe a car can do 20 and be fine, but their braking system works differently. A driver is unlikely to flip their vehicle over if they brake suddenly at 20mph, but a cyclist is quite likely to either go over the handlebars or be unable to come to a complete stop quickly enough.
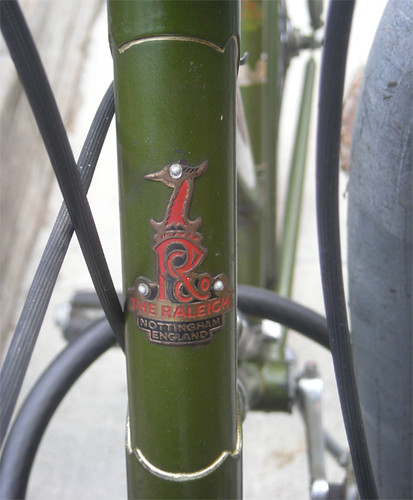 You may have noticed that on some bicycles, the edges of the lugs are attractively outlined in gold or in a contrasting colour. This treatment is called "pinstriping" and is done by hand after the bicycle's frame is painted. I like the look very much and decided to try it on my Raleigh Lady's Sport, in preparation for a more serious project. I was nervous, but it turned out to be easier than I expected. If you want to give it a try yourself, here is how:
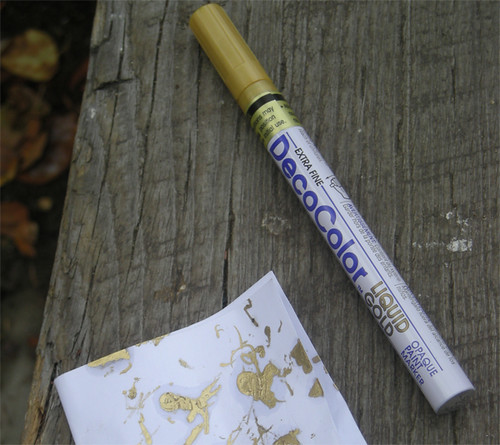 To go the truly professional route, you will need enamel paint and a pinstriping brush in the smallest size available. Having said that, I do not think these tools are necessary unless you are an experienced professional and are pinstriping a $3,000 frame with super-intricate lugwork. The enamel method can be difficult and messy, plus enamel paint contains led. Instead, I recommend a paint pen. Even professionals use these for simple projects. Several manufacturers make quality paint pens that are suitable for pinstriping bicycle frames, including
  The paint pen needs to be started by pressing down on the nib and pumping it several times - something best done on a piece of paper. When the paint flows through the pen slowly and evenly, you can begin.
 Before starting the process, it is a good idea to clean the edges around the lugs and wipe them dry. Otherwise, your paint pen may get clogged with dust and grime. Once the area is prepared, simply begin to trace around the lugs with the paint pen, at a slow and even pace.
 If the pen skips over a spot, go back and carefully re-trace that spot. If your hand shakes and you make an uneven line, or if the paint smears, wipe it off quickly with your fingertip or fingernail before it dries.
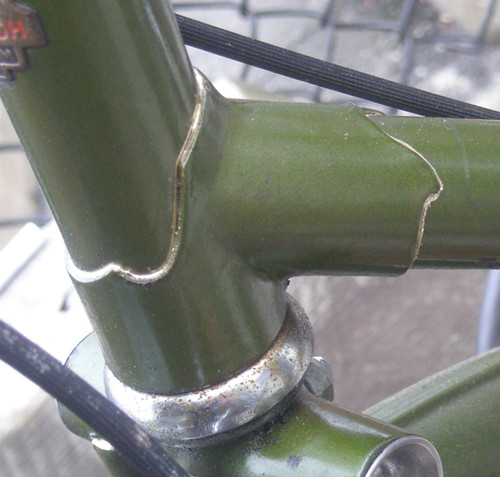 Once the paint dries, the marks you have made will be water resistant. If you notice a mistake after that happens, you can still get rid of it by carefully scraping the paint marks off with an exacto knife or a razor blade.
 One issue you might encounter with rougher lugwork, is jagged edges. The lugs on my Raleigh Lady's Sports are quite crudely finished, and as you can see above, it can be difficult to make smooth outlines when the edge itself is crooked. But don't worry about that too much; these little details aren't noticeable unless you really examine the lugs up close. And I can assure you that the pinstriping on standard production vintage bikes is just as messy: Whoever outlined the lugs on my Motobecane at the factory did a sloppier job than my DIY.
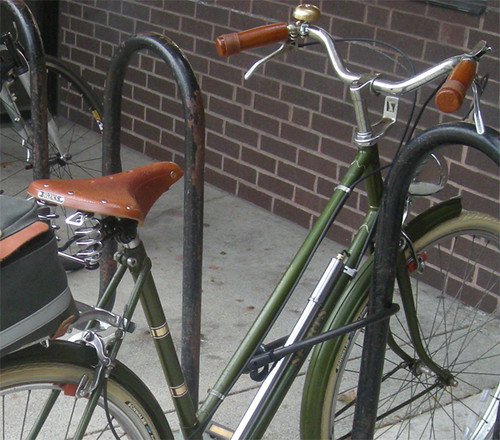 So really, don't be afraid to go for it. If you have an old bicycle you'd like to spruce up, pick up a paint pen and give it some nice lug accents.


 When it comes to wrapping handlebars, the typical options are cloth tape and cork tape. And my impression is that many, if not most, cyclists today consider cork tape to be more comfortable. On the surface this makes sense: cork is softer, and gripping something soft ought to feel better than gripping something hard.
 However, I generally prefer cloth tape. This tends to surprise people, but here is my reasoning: I feel that the softness of cork tape can be counterproductive, because it necessitates a tighter grip. When I ride a bike with cork handlebar tape it initially feels cushy, but over time I notice that the cushiness is making me grip tighter and my hands grow tired from the exertion. Because cloth tape is firmer, it allows my hands to relax and I am not perpetually squeezing.
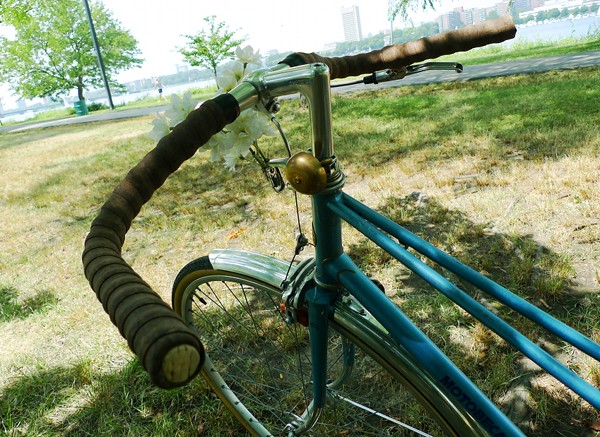 Similarly, I always had some form of cork tape or grips on the vintage Motobecane mixte I used to own, because its aggressive geometry would place too much pressure on my hands.
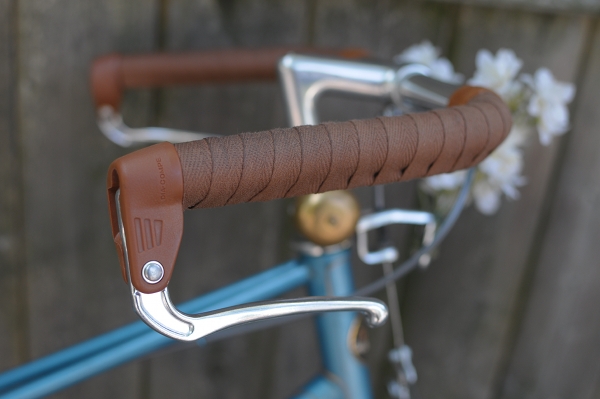 But once I managed to slacken the seat tube angle (with the help of a swept back seat post) and improve the hand position with the Belleville handlebars, holding the bars finally became comfortable and cloth tape felt better than cork.
 A number of times now, I have been approached by other cyclists and asked how I "can stand" having my handlebars wrapped in cloth tape, as well as how I manage to cycle without padded gloves. Don't my hands hurt? Well, no. I feel no pressure on my hands, so the bar tape is really just there to provide a pleasant surface texture to the handlebars, rather than to "fix" any discomfort issues. Since cork tape is fairly new, I wonder what those who have been cycling since "back in the day" think about the cloth vs cork issue.


 Took the dogs and when to Jemez Creek for a walk the other day.


 First crampon I have actually seen that does fits the Scarpa Ultra. Obviously some serious thought went into these guys.