As part of our Christmas gifts to the kids, we rented a spot in the Keys for a week so we could spend time there together. Today we headed down there and as always, the drive was incredible.
We got set up fairly quickly and the neighbors from two sides came over and introduced themselves. I don't think we've ever had such friendly neighbors before! Here is what is one row in front of us:
Not too shabby, huh? Of course the guys had to check out the smelly seaweed.
Home sweet home...for a week at least!
Living the life in the beautiful Florida Keys!
Tuesday, November 30, 2010
Monday, November 29, 2010
A (Pashley) Penny for Your Thoughts
The Pashley Pennyis the companion model to the Parabike I wrote about earlier. This unusual bicycle looks vaguely old-fashioned, but unlike the Parabike it is not based on a specific vintage design. Part cruiser, part mixte and part mountain bike, its uniqueness is enhanced by eccentricities such as the split curved downtubes. The Penny defies classification, and this seems to be how the manufacturer intends it - explaining that the bike "provides the perfect excuse to experience more rural rides."
While the Parabike's aesthetic is defined by the continuous curvature of its top set of twin stays, from head tube to rear dropouts, in the Penny the curve is interrupted and inverted. This difference is so visually dominant that it overshadows the structural similarities between the two bikes. The Penny also lacks the military/historical somberness of the Parabike, coming across as more light-hearted.
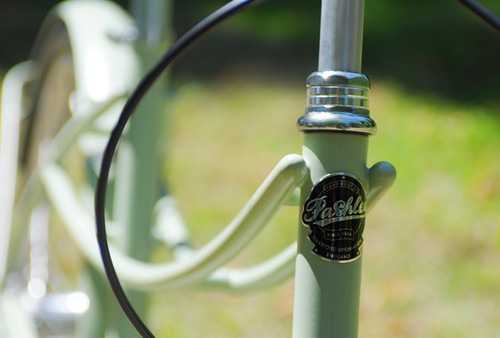
Made of cro-moly steel, the Penny is handbrazed and powdercoated in Stratford-upon-Avon in England, like all Pashley bicycles. It is fairly lightweight for its category of bikes, coming in at under 30lb.
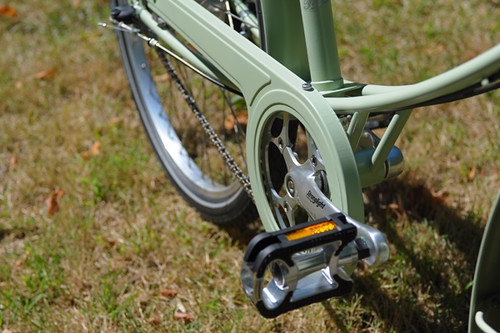
Like the Parabike, the Penny is built for 26" wheels and fitted with 26 x 1.75" Schwalbe Marathon tires.Colour-matched fenders and chainguard are included.
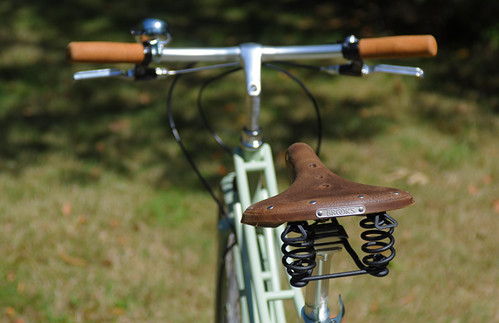
Components include a 5-speed Sturmey Archer hub, hand-operated hub brakes front and rear, a Brooks B67S saddle, a Stronglight crankset, non-slip platform pedals, rubbery "faux cork" grips, and a large bell.Unlike the Parabike, the Penny is set up with straight, rather than swept back, handlebars.
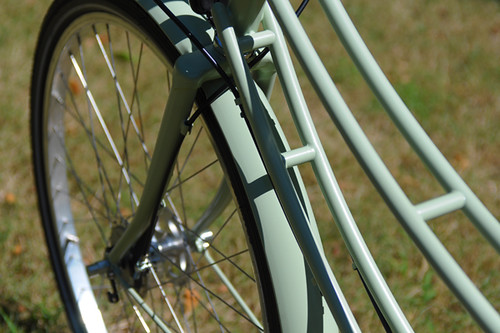
Standing over the bicycle for the first time, I was overwhelmed by all the flowy slender tubes; it was a bit like standing over a swaying rope bridge. Not that the tubes sway. It's the form and the repetition that give that impression of movement. A unique design to be sure.
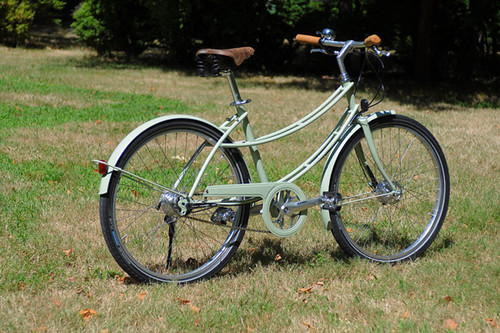
One thing I had wondered about when seeing pictures of the Penny, was whether the stepover was low enough to be practical. Unlike a traditional mixte, the twin parallel stays here don't extend all the way down to the rear dropouts, but connect to the upper seat stays - which places them rather high. However, this is compensated for by their downward sweep. When mounting the bike, the stepover height resembles that of a typical mixte.
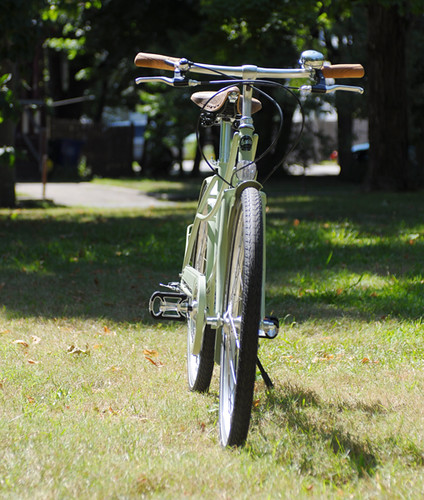
Riding the Penny, my first impression was that it felt too small for me (I am just under 5'7"). My test riding partner agreed that the Penny's "cockpit," even with the straight handlebars, felt smaller than the Parabike's. Later I looked up the sizes of the two bikes and was surprised to see them described as the same: 19" (48cm). Of course this measurement refers to the seat tube length, and it's possible that the Penny's virtual top tube is shorter than the Parabike's. Regrettably, I did not measure the bikes and have not been able to source geometry charts. But the good news is that the Penny will work well for smaller riders and those with shorter torsos.
Putting the fit issue aside, the ride quality and handling of the Penny felt very similar to that of the Parabike, which I liked very much: maneuverable, extremely cushy over bumps, mountain-bikey but with a relaxed cruiserish element to it.These are entirely different bikes from Pashley's Roadster and Princess line.Personally, I prefer the way the Penny and Parabike ride to the classic Princess. Of course the looks are a matter of taste.
One advantage of the Penny over the Parabike, is that - to my eye at least - its aesthetics do not conflict with a standard rear rack. So turning it into a practical city bike would be fairly simple. Unfortunately, dynamo lighting is not included. Also not included are the waterbottle cage mounts that I noticed on the Parabike. Step-through frame designs often do not lend themselves to this, and it's too bad. Finally, I am not sure why the Penny was set up with straight handlebars rather than swept-back bars - I suspect that much of this bike's target market would find the the latter more comfortable.
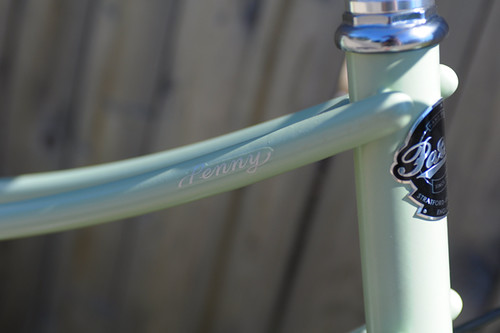
In their description of the Penny, Pashley suggests that this bike is meant to move effortlessly between town and country. I can see that. Provided that it's a fairly flat area, this bike could feel equally enjoyable to ride through meadows and forests, on cobblestones and on busy city streets, for shorter and longer distances. It is a nice combination of comfortable, maneuverable, and intuitive to handle. The durable powdercoat and the enclosed brakes and gears allow outdoor storage and make this bike a good choice for winter and inclement weather conditions. If the unique look of the Penny appeals to you, the bike is worth taking seriously.
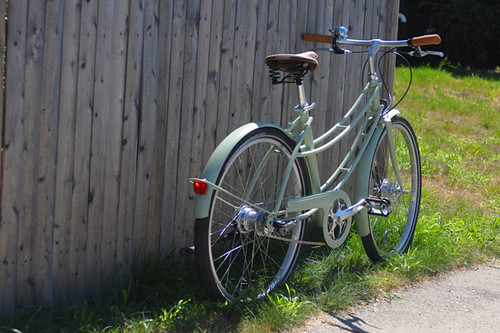
The Pashley Penny is available in "willow green" (shown here) or "dusk blue" - a dusty indigo. Current retail price is $1,195. Both the Parabike and Penny are available for test rides at Harris Cyclery in West Newton, MA. Many thanks to them for setting up these demo bikes.
Sunday, November 28, 2010
Mt. Hood
Mike and Dennis starting up Mt. Hood going by the jumps at Timberline.
Our campsite and an awesome sunset behind Illumination Rock.
Dozens of climbers on the Hogsback and others traversing to the Old Crater Variation. There was a lot of falling ice on the mountain this weekend. Two climbers were seriously injured and many others had minor injuries. Dennis and I made it part way up the Hogsback when we saw a guy with a bloody face. He had been hit by ice. There was a definite need for speed if we were going to cross the shooting gallery. Dennis and a lot of other climbers called it good at the Hogsback. As I reached the traverse, I decided that I did not want to be trapped behind a bunch of slow moving climbers, so I opted for the Pearly Gates instead.
The Pearly Gates were not being used very much due to their steep, icy condition. I figured it was safer than spending 30 minutes in a shooting gallery. Everything went well until I stopped to take some pictures. Wouldn't you know it, I got smacked in the knee with a chunk of ice while I was taking pictures! I knew better.
I topped out, took some pictures and then turned to head down with the crowds. I discovered that while I was on the top, a guy had fallen off the traverse and tumbled 500'. He was seriously injured and had to be hauled off the mountain. Dennis had already broke camp and we had a nice descent in perfect snow.
Saturday, November 27, 2010
Back in Florida with Friends and Family
It is so odd to go from weather where we had the heater on, to wearing shorts the next day...but that's what happens when you travel hundreds of miles in one day. We have landed back in Florida and it's good to be back. Last year I was a bit sad when we came back because I knew it meant travel would not be happening. This year I couldn't get back fast enough!
We were were tickled pink that we made it back in time to see Zoe. On top of that goodness, Auburn was in Orlando so we got to see her too. Even though I was exhausted from the trip, I still soaked up the sunshine of the two girls that I adore so much.
Thursday, November 25, 2010
Snoqualmie Mountain ..
Sammy and I planned a day of climbing something for Sunday and we didn't want it to be too intense. After throwing around a few ideas we settled on Snoqualmie Mountain. I have never been up it, and Sammy had when there was no snow, so it would be a new experience for both of us.
We arrived in the Alpental parking lot a little after 7am and were discussing our route options. Sammy was originally thinking to come up the Commonwealth Basin and then access Snoqualmie from Cave Ridge. We had both done that approach for winter ascents of Guye Peak. The guidebooks tell a tale of going up the trail to Cave Ridge from the Alpental Parking lot. I suggested we try something new and if it went, the distance was a whole lot shorter than circumnavigating Guye Peak.
From the parking lot we picked a high spot below a tree band that we would go up and assess the conditions to see if we could continue upward. We figured on twenty minutes to that point and potentially leaving us with enough time to come down and try the other route if this one did not go.
We entered the snow at the "Transceiver Training Area" and started to head up. Within five minutes it seemed like we were half way to the trees. Then the slope got steeper. Sammy and I stayed in some tree where we were following steps and we felt the snow was a little better. It was still before 8am and the sun was not hitting the slopes and the snow was hard and icy. We wondered why we brought snow shoes and contemplated stashing them. I said it would be a guarantee that we would be in waist deep snow later if we cached them now, so we kept them on our packs. This was Sammy's first time on steep snow this season and he was not feeling great about the snow climbing and lagged behind me a bit. I broke out of our stretch of trees and waited for him at a final tree in a more level area before we were to make the push to the trees above to see if the route went.
At this point, Sammy was having reservations about climbing the steep snow. But we agreed to go to the trees to see if the climbing became less difficult. Since we were on more level terrain, we donned crampons at this time. That decision gave both of us a little confidence boost to make the trees.
Nearing the trees, I went ahead of Sammy to check out the situation. I had to cross a moat with a small ice bridge with the help of an alder grab and then front point up steep solid snow into the woods. I stopped below a fallen log. While I thought the terrain looked easier above the log, I did not see any easy ways around it that did not involve minimal snow on rock or other loose terrain. I relayed the information to Sammy who made the decision to descend.
Sammy downclimbed facing in while I attempted to get out of the trees without having to downclimb over the small moat I came up over. It took me a while to reach Sammy after he returned to the more level area where we had put crampons on. At this point we had probably burned too much time to attempt via the Commonwealth Basin.
Fortunately due to our time wasting, the temps were a little warmer even if the sun was now obscured by clouds. Sammy got a new dose of confidence and started to traverse the slope to our left. Before we knew it, we were following another boot path up into the trees and feeling like we might still have a chance at the summit. At a minimum we were hoping to gain Cave Ridge and get a view.
Then we followed the the boot path to ice. There was about an eight foot stretch of maybe 40° ice. I started to chop steps into it. I made some moves with my left foot on rock and my right on ice. I had to swing my ax just to get the pick in and inch. A few moves up I questioned what I was doing, and Sammy and I set about to find another option up. Sammy set out on a traverse left while I tried a section directly above us. Neither was going to go without spicy moves on thin snow over moats and wet rock with significant shrub pulling only to get onto a similar steep hard snow slope. All the while considering how we would get back down once we got around the obstacle. After checking four options around the ice patch we finally decided to head back to the car. We down climbed through the woods back out to the open slope where the sun was shining and the snow already quite soft. We removed our crampons and plunge stepped our way back to the car.
Sammy nearing our high point
Before the plunge step down, I told Sammy it was our hubris that caused our failure. While perhaps an exaggeration, we both had underestimated this climb and had full expectation of reaching the summit. This expectation of easy climbing affected me (at least) in regards to my head space when the going got difficult. Climbing when not in an ideal head space is taxing, and not why I go out.
The plunge step out
I usually say that you learn more from a no summit climb than from a climb where the summit is achieved. On the way down and in the car we discussed things we took away from this. One was that we waited too long to put crampons on. I guess we succumbed to the boiling frog issue on that one. Because we underestimated the climb and snow conditions, we did not bring second tools or steel crampons, not to mention helmets or any type of rope.
Overall we had a fun time and joked about the situation throughout. It was great attempting a climb with Sammy and now I'll have a better idea for the next time I give Snoqualmie Mountain a go.
Monday, November 22, 2010
An Update...
After having arrived at my friends place in Louisiana last Friday evening, I've been off the road for a few days. I'll be here for a couple more days but am planning to leave on Sunday. Even though it has been cold here (highs in the 40s and lows in the 20s) I'm thankful that I'm not further north and that I don't have to endure the snow and colder weather! And even more thankful for friends that provide a place to stay out of the weather!
I've been taking advantage of the “down time” to work on a little project... I've decided to “dismantle” my website. It has been more than two years since I've added anything new so I think it is time to let it go. The Whitley County pages are going to be moved to the website of the Genealogical Society of Whitley County (which is now at its new location on the web) and some of the family data will eventually be moved here to this blog. Yesterday, I finished modifications to the Whitley County pages and got them sent off to their webmaster.
Now I've got to consider how and when family information will be posted to the blog. There is my Grandmother's autobiography, a series of 30+ letters written to the Berlin family in the 1860s and 70s, and a lot of obituaries that I've transcribed. Those things will keep me busy for a while ;-)
But mostly, I'm just takin' it easy.... and thinking of warmer days...
Sunday, November 21, 2010
National Key Deer Refuge
There are some endangered animals in the Keys, and the key deer are some of those animals. The key deer only live in the Keys in fact.
There is a refuge here for them. They also limit the speed that you can drive in an attempt to keep them safe. There are only around 800 of the deer. Around 100 were killed by cars last year. So what is so unique about these deer?
Their size! They are on average two to three feet tall when fully grown. They look just like the deer in Virginia, just smaller.
I think they are beautiful!
We drove around the island and enjoyed the sights and sounds beyond the deer.
And now we are hanging out. Austin is working on our yearly Gingerbread House. Every year he says he is not doing a gingerbread house because he is too old. And every year, he jumps in and wants to do the whole thing alone. He is quite the pro at it by now. You can also see our Christmas tree in this picture:
It is about the size of the key deer here! So cute!
Living the life in the Florida Keys!
Saturday, November 20, 2010
Tall Boots, Zippers, and Mixte Stays
If you ride a mixte with twin lateral stays and wear tall boots with zippers along the inseams, you may notice that the zippers can rub against the stays as you pedal, which, over time, can damage the paint. This was a big problem on my vintage mixte - whenever I would wear boots like these, the entire length of the zippers would rub. On theRoyal H. this is less of a problem -either the stays must be closer together, or my feet further apart on the pedals. The zippers themselves clear the stays and only thepull tabs hit them occasionally. Still, it won't do to have metal tabs repeatedly hit parts of the frame.
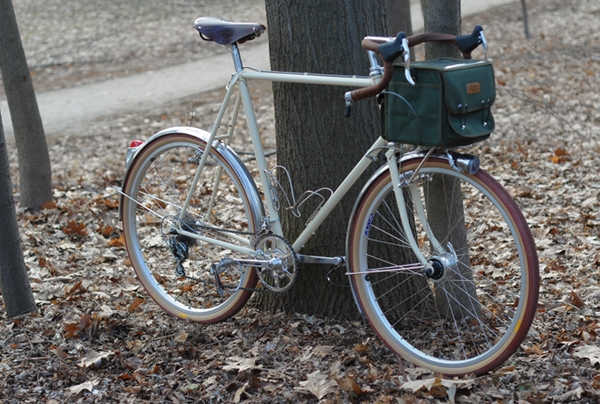
I am going to try covering the pull tabs with black electrical tape or something similar. If that doesn't work, then I guess I just can't wear these boots on the mixte. Unfortunate, because I don't own that many pairs of footwear. My previous pair of tall boots had zippers along the back, but after wearing them out I was not able to find a replacement with the same design. Just a little glitch to be aware of when it comes to mixtes and tall boots!
Friday, November 19, 2010
Creamy, Dreamy 650B Conversion
With his latest project, our neighbour Somervillain is quickly establishing himself as Vintage Bicycle Refurbisher Extraordinaire. This dreamy creature began life as a 1984 Shogun 1500 - a good, yet unremarkable touring bike. It has now been transformed into something quite exquisite.
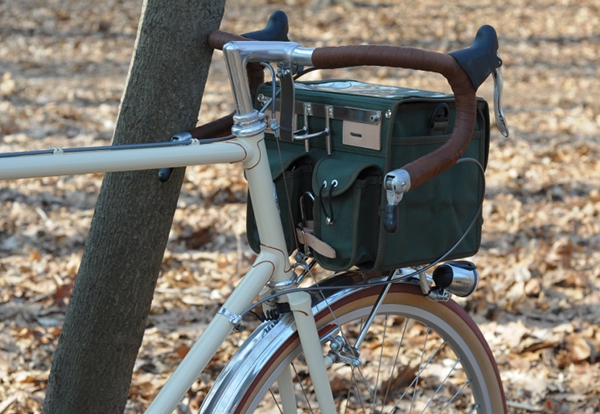
The 25" frame was stripped of its original paint and powdercoated a creamy "almond," the lugwork then outlined in copper.
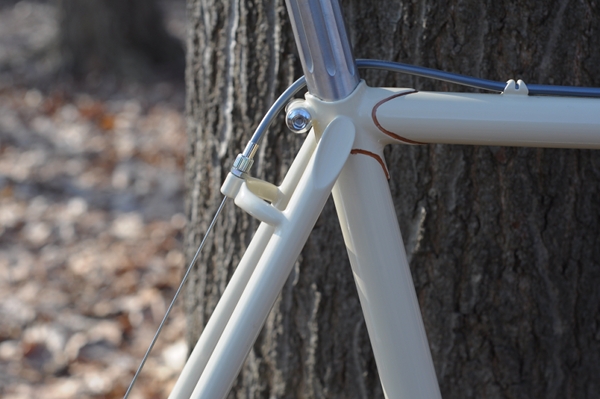
I think that it's pretty difficult to get the perfect shade of cream: If it's too pale, the bicycle looks bland and if it's too saturated the bicycle looks yellow. This shade looks just right to me: classic, soft and a little mysterious.
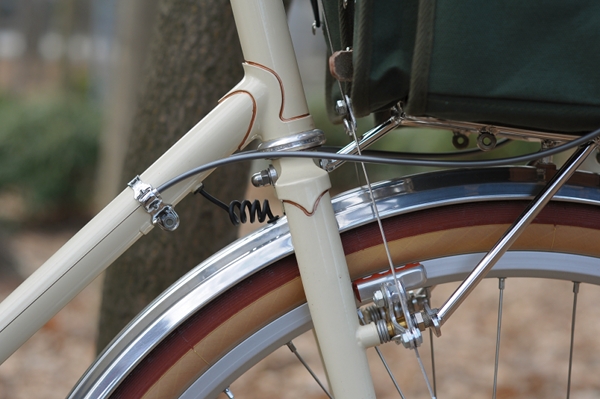
The Shogun frame had a high bottom bracket and sufficient clearance for wide tires with fenders, making it a great candidate for a 650B conversion. However, the cantilever bosses had to be relocated in order to accommodate the new wheel size. Both this and the powdercoating were done by Sugarcoat/ Geekhouse. Notice also the internal routing for the dynamo lighting.
Internal routing exit for the tail light. I will not even try to describe the routing, but Somervillain shows the step-by-step processhere.
Rear cantilever bosses, Mafac brakes, KoolStop brake pads.
The headlight is the Bausch & Mueller Lumoteq IQ (I have this light on two of my bikesand love it), and the DIY bracket is fashioned out of a caliper brake.
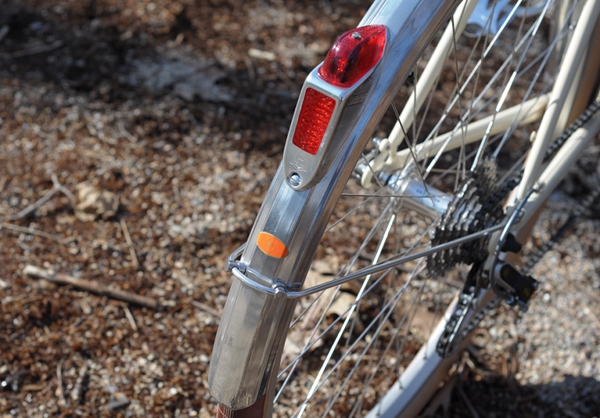
The tail light is a vintage Soubitez converted to LED with Bausch & Mueller innards.
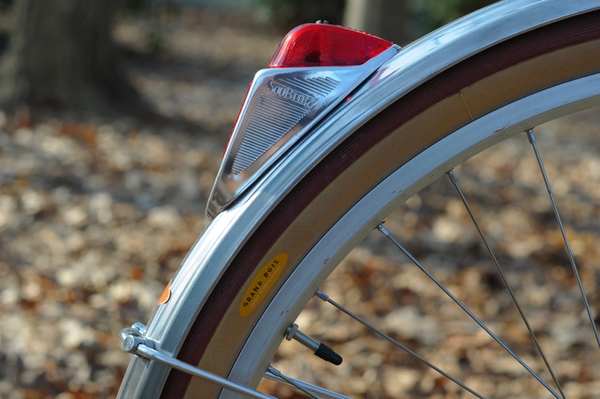
Tires are the red Grand Bois Hetres, with Zeppelin fenders from Velo Orange. I have this same set-up on my Rivendell, only with the cream version of the tires. TheGrand BoisHetres are absolutely magical in their cushiness and a 650B conversion is worth it just for them alone.
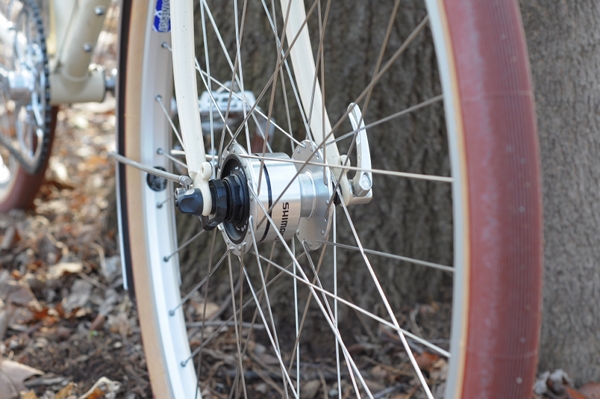
Shimano dynamo hub (which Somervillain says causes slight vibration at high speeds when the light is on, so he is considering changing it to a Schmidt SON).
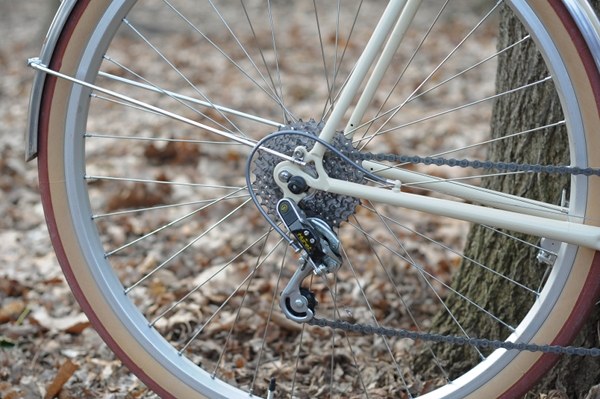
Huret rear derailleur. I forgot the details of the cassette, so perhaps Somervillain will remind me or post the specs.
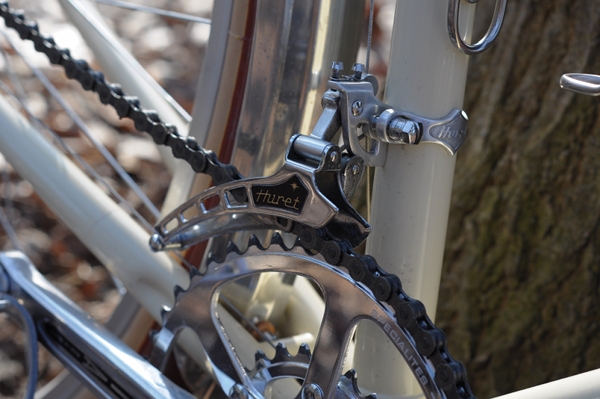
Huret front derailleur.
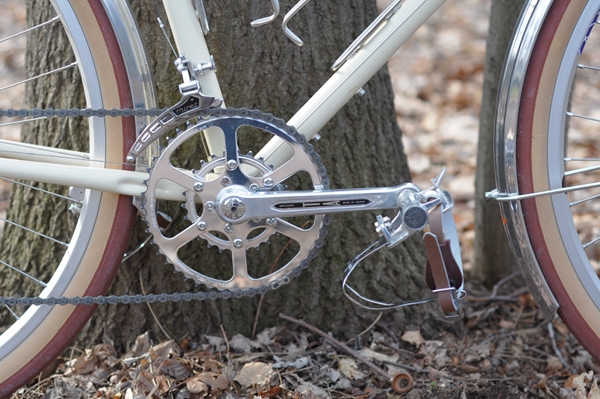
Beautiful TA crankset.
VO Moderniste bottle cages.
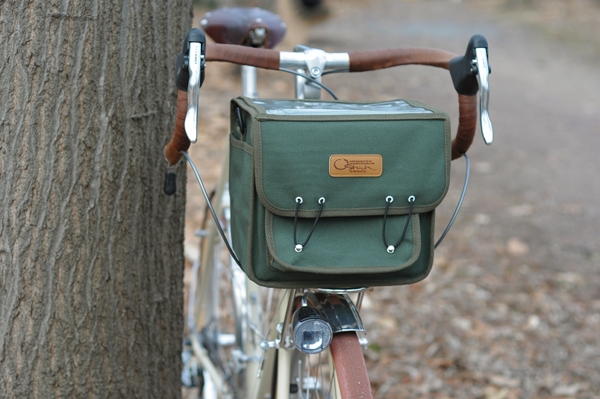
Belleri Randonneur bars, VO Pass Hunter front rack,Ostrich handlebar bag.
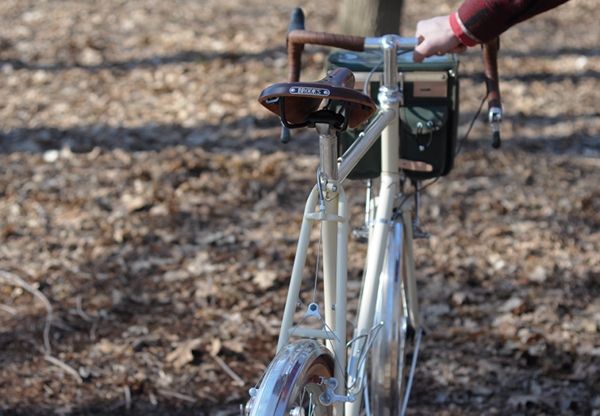
And Brooks B17 saddle.
Perhaps Somervillain would like to go into further detail in the comments, but one interesting thing about this build is that many of the components - or at least the manner in which they are installed - are modified in a way that makes them better integrated with the frame. The result is an exceptionally clean and harmonious look.
Having tested this bicycle out on a metric century ride last weekend, the owner is well pleased with its comfort and performance. Sadly, I am not tall enough for this 25" frame, so I will have to take his word for it. Given that Somervillain has other beautiful bicycles, I am curious how this one compares and what role he ultimately sees it occupying. Will it be his long-distance tourer? Time will tell. Either way, this project was a major accomplishment in its marriage of vintage and custom elements. The frame, the modifications, colour, the components - simply dreamy.
Subscribe to:
Posts (Atom)